I attempted to do everything with ffmpeg, but found there were some limitations with dissolving and so on that seemed to require scripts and sort of reinventing the wheel1. Accordingly, looked at GUI's and Kino stuck out (GTK libs), but seemed to require a lot of dependencies. Nevertheless, jumped in.
Tuesday, December 20, 2011
video editing - command line
Links: Kino site
I attempted to do everything with ffmpeg, but found there were some limitations with dissolving and so on that seemed to require scripts and sort of reinventing the wheel1. Accordingly, looked at GUI's and Kino stuck out (GTK libs), but seemed to require a lot of dependencies. Nevertheless, jumped in.
I attempted to do everything with ffmpeg, but found there were some limitations with dissolving and so on that seemed to require scripts and sort of reinventing the wheel1. Accordingly, looked at GUI's and Kino stuck out (GTK libs), but seemed to require a lot of dependencies. Nevertheless, jumped in.
Sunday, December 18, 2011
usb external drive - misc
Occasionally, the problem of "stale nfs file handles" arises on an external drive. This is a strange error which I believe has to do with a file changing without it's time stamp being updated. I have no idea which index or hash this offends, but it seems to occur with external USB drives on occasion, in such a way that prevents mounting the drive. What to do? My first thought was to run fsck, but without mounting, we can't be sure of the "dev" name to provide fsck, and neither can we run fsck when the device with stale handles is mounted.
The best way to break this impasse is to use udevmonitor or, if now under the dreaded "systemd", udevadm monitor --environment --udev", to get the block device name. Then just verify it's unmounted, and fsck it. Let's say we plug-in our our USB drive with stale NFS file handles, and it becomes labeled "/dev/sdc" by the system when it's detected...
The best way to break this impasse is to use udevmonitor or, if now under the dreaded "systemd", udevadm monitor --environment --udev", to get the block device name. Then just verify it's unmounted, and fsck it. Let's say we plug-in our our USB drive with stale NFS file handles, and it becomes labeled "/dev/sdc" by the system when it's detected...
SysV
# udevadmin monitor [plug-in device]
# umount /dev/sdc
# fsck /dev/sdc
SystemD
# udevadm monitor --environment --udev [plug-in device]
# umount /dev/sdc
# fsck /dev/sdc
Monday, November 21, 2011
ffmpeg - x264 - video libs -avconv
Links: libav - avconv, lavf forum post identifying lavf circular problem ffmpegsource ffmpeg usage
Edit: Libav is the starting point, inside which lavf is the key. It's a catch-22 to install this as you will learn when installing x264, or can read many places, eg here. It's apparently available only inside libavcodec, not just x264. Ffmpeg is being deprecated by avconv. Once you've located an x264 with lavf, the order that works is 1) x264, 2)xvidcore 3) ffmpeg, and 4) finally recompile and install x264 again. "FFmepgsource" supposedly includes lavf, but appears to be windows-only code.
If you're going to eventually install avidemux, suggest doing so prior to any of the above. Avidemux (without warning) overwrites one's ffmpeg install in such a way that gives MUCH less ffmpeg functionality afterwards (as seen in "ffmpeg -formats". For commiseration about ffmpeg dependencies, see my post earlier today venting indignant rage. But in this post, let's make it all work. I did a relatively extensive post a year ago updating ffmpeg, but at that time, I didn't realize how much I had lucked-out by having a current version of x264 in place. This time, I found out the hard way, as I noted earlier today, about a circular lavf dependency.
The unfortunate process due to SHIATTY DESIGN is going to be 1) x264 without lavf, 2 ffmpeg , 3) uninstall x264, 4) recompile and reinstall x264 with lavf-enabled. NOTE: also updated to the latest libtheora (v.1.1.1) and libmp3lame (v.3.99.2). Lame went in standard:
Edit: Libav is the starting point, inside which lavf is the key. It's a catch-22 to install this as you will learn when installing x264, or can read many places, eg here. It's apparently available only inside libavcodec, not just x264. Ffmpeg is being deprecated by avconv. Once you've located an x264 with lavf, the order that works is 1) x264, 2)xvidcore 3) ffmpeg, and 4) finally recompile and install x264 again. "FFmepgsource" supposedly includes lavf, but appears to be windows-only code.
If you're going to eventually install avidemux, suggest doing so prior to any of the above. Avidemux (without warning) overwrites one's ffmpeg install in such a way that gives MUCH less ffmpeg functionality afterwards (as seen in "ffmpeg -formats". For commiseration about ffmpeg dependencies, see my post earlier today venting indignant rage. But in this post, let's make it all work. I did a relatively extensive post a year ago updating ffmpeg, but at that time, I didn't realize how much I had lucked-out by having a current version of x264 in place. This time, I found out the hard way, as I noted earlier today, about a circular lavf dependency.
x264 install
$ ./configure
Platform: X86
System: LINUX
cli: yes
libx264: internal
shared: yes
static: no
asm: yes
interlaced: yes
avs: no
lavf: no
ffms: no
gpac: no
gpl: yes
thread: posix
filters: crop select_every
debug: no
gprof: no
strip: no
PIC: no
visualize: yes
bit depth: 8
The unfortunate process due to SHIATTY DESIGN is going to be 1) x264 without lavf, 2 ffmpeg , 3) uninstall x264, 4) recompile and reinstall x264 with lavf-enabled. NOTE: also updated to the latest libtheora (v.1.1.1) and libmp3lame (v.3.99.2). Lame went in standard:
$ ./configure --prefix=/usr --enable-nasmNow on to the big jobs.
$ make
# rm /usr/lib/libmp3*
# make install
1 - x264 (v.20111120 build)
$ ./configure --prefix=/usr --enable-lavf --enable-visualize --enable-shared
Platform: X86
System: LINUX
cli: yes
libx264: internal
shared: yes
static: no
asm: yes
interlaced: yes
avs: no
lavf: no
ffms: no
gpac: no
gpl: yes
thread: posix
filters: resize crop select_every
debug: no
gprof: no
strip: no
PIC: no
visualize: yes
bit depth: 8
2 - ffmpeg (v. 0.8.10)
$ ./configure --prefix=/usr --enable-libx264 --enable-shared --disable-static --enable-pthreads --enable-x11grab --enable-swscale --enable-libfaac --enable-libmp3lame --enable-libspeex --enable-libtheora --enable-libvorbis --enable-libxvid --enable-gpl --enable-postproc --disable-ssse3 --enable-yasm --enable-nonfree --arch=i686 --cpu=i686make, #make install. This was without incident, though many warnings during make.
3 - x264 uninstall and recompile (fail)
$ ./configure --prefix=/usr --enable-lavf --enable-visualize --enable-sharedSo nothing has changed yet. Let's try ffmpegsource
Platform: X86
System: LINUX
cli: yes
libx264: internal
shared: yes
static: no
asm: yes
interlaced: yes
avs: no
lavf: no
ffms: no
gpac: no
gpl: yes
thread: posix
filters: resize crop select_every
debug: no
gprof: no
strip: no
PIC: no
visualize: yes
bit depth: 8
4 - ffmpegsource (v.2.16)
As if things are not unhelpful enough in ffmpeg installation, these dumbasses who created ffmpesource decided to package their files in 7z compression. So, instead of using some universally installed compression like .tgz or bz2, they know you will have to install p7zip just to get their files.5 - p7zip
But wait, there's a problem, what a surprise. P7zip, just like ffmpegsource, also has a non-standard installation process and it doesn't work. It's one of those installations where they have premade makefiles and you copy over "makefile" and then use "make". The problem with their masterplan is, following their (shiatty) directions to the letter, it results in nothing butmake: *** No rule to make target `all2_test'. Stop.The entire process appears headed toward 40 hours simply for the portion of the work updating. I looked at the code, and it's not configured properly. Accordingly, I just ran
$ make -f makefile.oldmake all2This is just a generic bullshiat build, but at least the code in this makefile is more than just a set of processor optimizations without any instructions.
6 - back to ffmpegsource (v.2.16)
Three hours later, now that it's extracted, I see that this source is nothing but Windows crap; a .dll and an .exe. It's advertised as "cross platform", but that's something I have yet to see. So I was finally able to unpack FFmpegSource 2.16. This began to compile, but then threw errors during make:src/core/lavfaudio.cpp: In constructor 'FFLAVFAudio::FFLAVFAudio(const char*, int, FFMS_Index&, int)':So it could not successfully build. This was likely a problem in the FFLAVFAudio definition inside header src/core/audiosource.h, since when I commented out the lines in lavfaudio.cpp, the same fail moved to lavfindexer.cpp, which included the same header. Indeed, grepping, we can see that the variable avcodec_open2 is nowhere used, let alone defined, in audiosource.h. So appears we're out of luck again. I'm no C programmer and the Linux version of ffmpegsource isn't even maintained anymore. After all of this, I'm really backed into a situation where my x264 is just not going to be compiled with lavf support. Very very very annoying.
src/core/lavfaudio.cpp:40: error: 'avcodec_open2' was not declared in this scope
7 - x264 w/out lavf
In8 - tests
No xvid encoding. I have libxvidcore installed, but it appears a bit outdated. Will attempt to update libxvid. I was sure I had it in my configure line, but it doesn't appear in ffmpeg -options either. Encodes to mp4. The latest download is xvidcore 1.3.2. Weird that it didn't pick it up in the ffmpeg ./configure. Conundrum and annoying, and I bet it comes back to the lavf issue again. Just have a feeling that's pivotal. For now though, will update xvidcore.9 - xvidcore 1.3.2
The source was difficult to locate on the Xvid.org site as the "downloads" tab only led to descriptions. Sourceforge had no files. Eventually I was able to Google into the latest 1.3.2 source. When unpacked, it has a lot of Windows garbage in there, so had to drill down into "build, generic", where I found normal configure options. Did a standard...$ configure --prefix=/usr...and it went in without incident. Now back to another attempt at ffmpeg with xvid in there.
$ make
# make install
library note
During ./configure, I often run across libraries not being found. It's good to make sure they're all in $LD_LIBRARY_PATH which you can just check with an "echo", like any other variable. Sometimes, I do this to be sure, if it looks funkyexport LD_LIBRARY_PATH=/usr/local/lib:/lib:/usr/libAlso, it's good to make sure any special paths are in /etc/ld.so.conf and then run a quick # ldconfig to update the list of libs in the system.
ffmpeg - x264 (FAIL)
Links: forum discussion of circular dependency for lavf
Full disclosure: This post is not a solution - it's a vent about program dependencies, one of those items where you're forced to waste a DAY or TWO for no good reason other than developers didn't use their heads around installation. Anyone who uses ffmpeg knows it's linked to libx264 like a hand-in-glove. Yesterday, I came across a very unappetizing twist in this relationship. I was deep into shrinking some videos into qvga format for a NAXA device (see previous post) and found that my 1 yr old ffmpeg release was concatenating video and audio streams into an AVI file in ways giving flaky playback. Video(libxvid) and audio(MP3) were stable individually but, once concatenated, could not reliably playback on every device. With MP2 audio, there was no problem, so that it appeared possible the problem was how MP3 streams were being packaged by ffmpeg. To rule this out, I started an update on ffmpeg.
The only solution possiblity I can see for this GARBAGE is to install x264 without lavf support, subsequeently install ffmpeg without lavf (because it's not in the x264, because it's not in the ffmpeg, because it's not in the x264, because...), then turn around and blow out the x264 and reinstall it with the crippled ffmpeg already in place (and no LAVF support within) and HOPE that the x264 can somehow provide LAVF when it doesn't see any in the ffmpeg. Finally, blow out the ffmpeg again, and reinstall it with x264 support enabled. Altogether, this would be 4 installations, but I don't see any other way to get the LAVF in there. Thanks, guys.
All I wanted was to get some videos down to qvga size, which was already days, now I see I'm going to have to fix the thing that i need to fix the other thing, etc etc etc, in order to, days later, have a working ffmpeg again, in order to get back on the long road to making qvga sized videos. What a bunch of shiat.
Full disclosure: This post is not a solution - it's a vent about program dependencies, one of those items where you're forced to waste a DAY or TWO for no good reason other than developers didn't use their heads around installation. Anyone who uses ffmpeg knows it's linked to libx264 like a hand-in-glove. Yesterday, I came across a very unappetizing twist in this relationship. I was deep into shrinking some videos into qvga format for a NAXA device (see previous post) and found that my 1 yr old ffmpeg release was concatenating video and audio streams into an AVI file in ways giving flaky playback. Video(libxvid) and audio(MP3) were stable individually but, once concatenated, could not reliably playback on every device. With MP2 audio, there was no problem, so that it appeared possible the problem was how MP3 streams were being packaged by ffmpeg. To rule this out, I started an update on ffmpeg.
Catch-22
After deleting my old version of ffmpeg, I downloaded ffmpeg version 0.8.6 and found during ./configure that my version of x264 needed updating. I blasted my old x264 and got on that, whereby I learned that I wanted yasm, of course, for an assembled (faster) version of x264. Yasm in, I returned to x264, and found that lavf support was not showing during ./configure. WTF? This is where I learned of a motherfarking CATCH-22 circular dependency that x264 developers had implemented. X264 LAVF support requires a version of ffmpeg already installed. But ffmpeg requires that x264 be installed. Each requires the other for lavf support, so where can you start? This means I could not install x264 or or ffmpeg with lavf support or, in other words, that they would both be USELESS CRIPPLEWARE. WTF?The only solution possiblity I can see for this GARBAGE is to install x264 without lavf support, subsequeently install ffmpeg without lavf (because it's not in the x264, because it's not in the ffmpeg, because it's not in the x264, because...), then turn around and blow out the x264 and reinstall it with the crippled ffmpeg already in place (and no LAVF support within) and HOPE that the x264 can somehow provide LAVF when it doesn't see any in the ffmpeg. Finally, blow out the ffmpeg again, and reinstall it with x264 support enabled. Altogether, this would be 4 installations, but I don't see any other way to get the LAVF in there. Thanks, guys.
All I wanted was to get some videos down to qvga size, which was already days, now I see I'm going to have to fix the thing that i need to fix the other thing, etc etc etc, in order to, days later, have a working ffmpeg again, in order to get back on the long road to making qvga sized videos. What a bunch of shiat.
Saturday, November 19, 2011
[solved] naxa nmv-155 sized playback (QVGA)

Let's see if we can get anywhere with this inexpensive media player. I find players like these NAXA's in bargain bins for $15, (probably $5 worth of parts in the unit), but the day I wanted to toy with one, I was only able to find one as cheap as $25. Bought it anyway.
In forums about these knock-off players, the two most common problems are USB recognition and media formatting. It's got a 4GB internal, and room for a card as well. But it's picky about file formats... it's cheap. Secondly, I was excited to read in its manual, that the NAXA can display PDF's (Edit: this was misadvertised; it reads only basic text files), in addition to MP3's, movies, and photos. Battery life is reasonable.
unboxing
Unit comes without any cover but fits into a G1 holder (remaining after I had a G1 stolen). A USB -> micro-USB connector cable, a 300mA AC->micro-USB charger, earbuds, stylus (a plastic dental pick also works), Windows disk, and a small manual.USB detection/connection
Threw out the Windows disk and plugged in the USB, and no auto-recognition took place in any file managers. Nothing in lsusb. Seeing nothing in udevmonitor either, I swapped USB cables with a known good USB cable (for a different device) and suddenly the NAXA appears in the file manager, no problems. It's identified there as "GENERIC USB DISK DEVICE Music Player" (3.5GB). We're already at less than the advertised 4GB. In lsusb, it appears as10d6:1101 Actions Semiconductor Co., Ltd D-Wave 2GB MP4 Player / AK1025 MP3/MP4 PlayerThis 2GB reading is probably the most accurate -- I've likely been ripped off: appears I have a Chinese 2GB device hacked to indicate twice its real capacity. Happens. A different system check (below) shows 3.7 GB, but I'd bet against it and with the 2GB reading.
# dfSummary: Ditch the included USB->micro-USB cable and the Windows disk. Storage expectations should be reduced to a little less than 2GB for this (likely) piece of shiat.
/dev/sdc 3709840 2084 3707756 1% /media/disk
video
Let's upload something less than 2GB and see if it plays.- MKV - First-up, a 1.4GB sports vid coded in MKV. Result: the file is not even detected in the device file manager. Can't even be seen there.
- AVI - Second, we'll do a standard AVI, let's go. Here's the encoding and resolution
Stream #0.0: Video: mpeg4, yuv420p, 608x336
This file appeared in the device. I attempted to play it, but the NAXA displayed a "file format error".
Stream #0.1: Audio: mp3, 48000 Hz, stereo, s16, 96 kb/s
QVGA = 320x240
Next step: record a short vid on the device, make sure it plays on the device (it did), and then download to the laptop and determine its settings and codecs.Duration: 00:00:17.93, start: 0.000000, bitrate: 551 kb/sSo 320x240 (ie, QVGA) and 551k bitrate, and only 64 k on the sound. This is what the NAXA makes and plays.
Stream #0.0: Video: mpeg4, yuv420p, 320x240
Stream #0.1: Audio: mp3, 16000 Hz, stereo, s16, 64 kb/s
Let's approximate that. I'll take a file taxi_s01e01.avi and, not worrying about B frames or whatever, split it into audio and video, and then render it back together, but in QVGA with MP3:
$ ffmpeg -i taxi_s01e01.avi -vn -ar 44100 -ac 2 s1e1.wavThis encoded without errors and played without errors.
$ ffmpeg -i taxi_s01e01.avi -vcodec libxvid -b:v 500k -s qvga -an s1e1.avi
$ ffmpeg -i s1e1.avi -i s1e1.wav -acodec libmp3lame
-ar 44100 -ab 192k -ac 2 -vol 330 -vcodec copy -b:v 504k qvga_taxi_s01e01.avi
the email angle
Most email attachments won't take more than a 20 second video clip without maxing out the 20Mb attachment limit. Try the 320x240 as a solution. It makes files roughly 30 x smaller than normal WXGA resolution. Not perfect, but a workable email attachment in lieu of those crappy MMS crippled vids. Use something like Ocenaudio to clean up your audio and put the video back together and email it.
$ ffmpeg -i s1e1.mp4 -i s1e1.wav -acodec libmp3lame
-ar 44100 -ab 192k -ac 2 -vol 330 -s qvga taxismall.mp4
Sunday, November 13, 2011
pdfedit - pdf's etc (FAIL)
Links: sourceforge - pdfedit www.boost.org Xournal
Like most blog posts, this one is born from annoyance. My current rage was with PDF books retreived from Project Gutenberg. Typical PDF book files should be a few hundred K and fast to load. Some are. Some are several MB and also open quickly. But a few are several megabytes and, while loading, push one's CPU to an unhealthy 100% for minutes, instead of for a few seconds. This subset of larger PDF's are of course impossible to open on portable devices. The problem is the Gutenberg volunteers make a normal PDF, but then add a 1200 lines of resolution photo of the book's cover to the first page of the PDF. It takes a lot of CPU and memory for PDF software to simultaneously render a huge photo down to a tray icon, display the huge photo full-screen, and load the first few pages of text. The fix is to edit such PDF's initial page, reducing the first page photo to a typical 75 or 150 lines of resolution photo.
So these PDFs need repairing or else one's CPU will need replacing, but is there a Linux program out there which does this? We can say "yes" definitively if we want to spend hundreds on the Adobe Acrobat solution. And there are well-proven Linux tools like pdftotext that quickly extract all the PDF's text unformatted. But what about a Linux program that just opens the PDF, allows us to edit, and then close the file? Based on this ideal, I decided to give PDFedit a shot.
I wasted half a day on the shiatty PDFedit product and was unable to install it or edit my PDF's. In the end, I ran pdftotext on the particular PDF I wanted to fix. I'll format that basic text file with LaTeX as I read it, and then recompile when finished -- the resultant PDF will be easily read on a portable device. This is extra work I'll first have to do with a desktop, so I guess I'll read the book at home.
Like most blog posts, this one is born from annoyance. My current rage was with PDF books retreived from Project Gutenberg. Typical PDF book files should be a few hundred K and fast to load. Some are. Some are several MB and also open quickly. But a few are several megabytes and, while loading, push one's CPU to an unhealthy 100% for minutes, instead of for a few seconds. This subset of larger PDF's are of course impossible to open on portable devices. The problem is the Gutenberg volunteers make a normal PDF, but then add a 1200 lines of resolution photo of the book's cover to the first page of the PDF. It takes a lot of CPU and memory for PDF software to simultaneously render a huge photo down to a tray icon, display the huge photo full-screen, and load the first few pages of text. The fix is to edit such PDF's initial page, reducing the first page photo to a typical 75 or 150 lines of resolution photo.
So these PDFs need repairing or else one's CPU will need replacing, but is there a Linux program out there which does this? We can say "yes" definitively if we want to spend hundreds on the Adobe Acrobat
installation (v.0.4.5)
Comes as a .bz2 because they have decided to pander to the Windows crowd, apparently. The README indicates "Boost" is the dependency. Boost is just a set of C++ libraries, so I ran configure before doing any checks to see if they might already be installed. Nope:checking for boostlib >= 1.20.0... configure: error: We could not detect the boost libraries (version 1.20 or higher). If you have a staged boost library (still not installed) please specify $BOOST_ROOT in your environment and do not give a PATH to --with-boost option. If you are sure you have boost installed, then check your version number looking in. See http://randspringer.de/boost for more documentation.
boost (v.1.47) installation
PDFedit's pretension of requiring Boost is annoying. For example, 1) C++ libraries sufficient for compiling are already on people's systems, we don't need a redundant set, 2) installing them means bloating one's system for no reason and, worst of all, 3) they are on Sourceforge servers so add an hour to the installation timeline. (Edit: indeed, the first download was 30MB and was a set of PDF documents mislabeled as source.) A half hour was already wasted, but it's a dependency, gotta get it in. Let's go directly to the boost site to get the libraries. And...the Boost site bounced me back to Sourceforge for another 53 frigging MB at Sourceforge 60K "speeds". Installing PDFedit is starting to look like a 2 hour operation.bootstrap
So, opened the PDFedit source. No configure file, no README. Great. Noting there are some bootstrap files however, so we're apparently dealing with frigging bootstrap. Now we have bad choices by both the Boost and the PDFedit developers. Also Boost appears to require Python. So the real dependency tree is apparently: PYTHON-->BOOST-->XPDF-->PDFEDIT$ ./boostrap.shThis doesn't work. I finally located some installation instructions. They're on the Boost website instead of in a simple README in the source. They appear partially inaccurate since they are without root. Let's start over and change it to a way it will work.
$ ./b2 --prefix=/usr
$ ./boostrap.sh --prefix=/usr
# ./b2 install
back to pdfedit (hours later)
I've almost forgotten why I needed to install PDFedit in the first place, but here we go. Did a mostly standard configure -prefix=/usr, however the results showed me that no tools or kernel tests would be included. Start over.$ configure -prefix=/usr --enable-tools --enable-kernel-testsThis went well except that kernel checks couldn't be configured due to some missing package apparently called Cppunit for which it wants version 1.10 or later. Let's see if we can get that in.
Cppunit (v.1.12.1) installation
This was a standard configure -prefix=/usr, make, # make install. No problems.back to pdfedit
Attempted 3 ways$ configure -prefix=/usr --enable-tools --enable-pdfedit-core-dev --enable-kernel-testsAll of these resulted in fatal errors during make
$ configure -prefix=/usr --enable-tools --enable-pdfedit-core-dev
$ configure -prefix=/usr
make[2]: *** [cpagecontents.o] Error 1Apparently the PDFedit source has design and documentation flaws much deeper than one can suss out in the time required for reasonable installation. On the first account, it should run with normal kernel settings. On the second account, they left the little detail of kernel recompiling out of their hard-to-locate documentation, when it should be the first thing noted. Further, the documentation neglects any information regarding which kernel switches would need to be set. So really, users would have to guess among 2,600 kernel options in order to use PDFedit. In short, PDFedit will either work on one's PC or it won't, dealer's choice. Troubleshooting using strace and finding the needle in the haystack of the entire PDFedit source, goes far beyond the investment most people should have to make to simply install a program. I certainly have more appealing things to do with two weeks.
make[2]: *** Waiting for unfinished jobs....
make[2]: Leaving directory `/home/foo/Download/pdfedit-0.4.5/src/kernel'
make[1]: *** [kernel] Error 2
make[1]: Leaving directory `/home/foo/Download/pdfedit-0.4.5/src'
make: *** [source] Error 2
I wasted half a day on the shiatty PDFedit product and was unable to install it or edit my PDF's. In the end, I ran pdftotext on the particular PDF I wanted to fix. I'll format that basic text file with LaTeX as I read it, and then recompile when finished -- the resultant PDF will be easily read on a portable device. This is extra work I'll first have to do with a desktop, so I guess I'll read the book at home.
Saturday, October 15, 2011
OCR with Tesseract
Links: Script which appends each JPG to a larger file :: training information
Note: for extracting text from PDF's, pdftotext is a go-to CLI tool. Can be configured for better line breaks, etc, too.
This page is based on tesseract, but others are available. Here's a quick scanning summary: Time: scan to binary JPG's at 200X200 lines. This makes output files of 600K each, but who cares, since they will be deleted. It takes about 15 seconds per JPG to OCR them. Accuracy: appears about 95%.
SOURCE: Tesseract source was at Google Code (thanks,guys), and was version 3.0 as I wrote this. Per usual, I didn't bother with reading or dependency checks, just gave it a shot.
Standard configure, make, and # make install seemed to go well, but I found on first run that it couldn't find its libraries. I strace'd and saw the wrong directories. Reaccomplished configure as...
Tesseract language files were available at the same Google code site where we initially retrieved tesseract itself. I selected english and spanish (in order to demonstrate to students), but there appears to be roughly 50 languages available there. They all come as .gz files; simply unzip and then add or remove them as desired from /usr/share/tessdata (following installation of tesseract). Most of us will only need to leave the english file in there -- eng.traineddata.
Note: for extracting text from PDF's, pdftotext is a go-to CLI tool. Can be configured for better line breaks, etc, too.
This page is based on tesseract, but others are available. Here's a quick scanning summary: Time: scan to binary JPG's at 200X200 lines. This makes output files of 600K each, but who cares, since they will be deleted. It takes about 15 seconds per JPG to OCR them. Accuracy: appears about 95%.
- Scan at 200x200 binary
- $ tesseract input.jpeg output
- Scan at 200x200 binary
- $ tesseract input.jpeg output
- concatenate the text files, if in numbered order, with...
$ cat * > onebigfile.txt
tesseract installation
ARCH: # pacman -S tesseract-data-eng This will pull in English data files, and the entire tesseract program.SOURCE: Tesseract source was at Google Code (thanks,guys), and was version 3.0 as I wrote this. Per usual, I didn't bother with reading or dependency checks, just gave it a shot.
Standard configure, make, and # make install seemed to go well, but I found on first run that it couldn't find its libraries. I strace'd and saw the wrong directories. Reaccomplished configure as...
$ configure -prefix=/usr...and all was fine. Or so I thought. I attempted to run the program and it couldn't open the jpeg file I was using for an input. Time to return to Google code and actually go through the ReadMe, apparently.
tesseract installation pt 2
The ReadMe indicated two additional steps to the above would be required: 1) installing "Leptonica", if I wanted tesseract to OCR image files other than TIFF's (eg, jpegs) and, 2) selecting language(s) to place into /usr/share/tessdata following the build and installation.leptonica installation
The main site for leptonica is another Google code site, but there are also many sites for users getting deeply into it as a physics analysis tool or so on. For my purposes, just downloaded the source (version 1.68 as of this writing) and performed a standard configure, make, and # make install, with the small configure modification of$ configure -prefix=/usr
tesseract installation pt 3
With leptonica apparently in without a problem, I built tesseract again, in order to let the build process recognize that leptonica was now in place. [Again, leptonica was installed to provide tesseract with the capacity to extract text from file types (eg. jpegs), other than TIFF's.] Tesseract installed smoothly again with a standard configure, make, and # make install, again using the slight modification$ configure -prefix=/usr
Tesseract language files were available at the same Google code site where we initially retrieved tesseract itself. I selected english and spanish (in order to demonstrate to students), but there appears to be roughly 50 languages available there. They all come as .gz files; simply unzip and then add or remove them as desired from /usr/share/tessdata (following installation of tesseract). Most of us will only need to leave the english file in there -- eng.traineddata.
tesseract summary
The program read text at 100% accuracy, from pages scanned at 300 lines in b/w, and took about 8 seconds (on my old system) per image to convert. Even adding scanning time, this should be significantly more efficient than typing speeds for most people, though maybe those in the 90+ wpm category can just retype, not sure. The installation steps in summary:- Unless only using TIFF inputs (eg faxes), verify installation of leptonica before building tesseract
- Download tesseract source, compile and install
- Download language files, unpack, and move (requires root) to installed /usr/share/tessdata directory
$ tesseract inputfile.jpeg outputname...which produces outputname.txt. For iterations, a simple script can roll through image after image.
still to come
Time permitting, I will install the OCRFeeder GUI frontend and see if that adds any pleasing advantages.forcing lib location during configure
So many times I can't count, I'll compile and install an application and then the application, which compiles without errors, won't be able to locate its libraries. I know the dependencies are there, but why can't the package find its libraries when it installed them? Annoying as hell.
So I run strace <app>, find where the app is looking, run find to locate the libraries, and then create soft links. This solves the problem, but sux when I might have to create 10 or 20 softlinks.
I'd much rather avoid softlinks entirely and use "configure" options to force libs go where they will be found, but there's an apparent Catch-22: I don't know in advance which directories the application will seek its libraries until after its installation. So, although I'd like to force "configure" to install libs to those directories, how do I know where the application will seek them until I install it and attempt to run it? Additionally, is the answer within make or configure?
solution
The answer, it would seem, is to force make to compile the app so that it both looks for its libs where I tell it to look, AND installs its libs into that location. Can it be done?configure or make?
Theoretically, it should be possible to change the installation directories either through manipulation of make or through configure. In make it would presumably be through a configuration file make.config or some such; in configure, by forcing the prefix each time, eg.$ configure prefix=/usrThe easier route appears to be to change it in configure. By default, make on my system appends /usr/local. This means, for example, that libs will install into /usr/local/lib. The easiest way to repair this is via configure "prefix" command as noted above. Using the command above, libs would be installed in the /usr/lib instead of /usr/local/lib. It also means however, that the bin file will install into /usr/bin instead of /usr/local/bin.
conclusion
Although there's very likely something like a make.config file to change its settings, I was unable to locate such a file with some cursory searching. The fast solution appears to be forcing the issue in configure using ,eg.$ configure prefix=/usr
Thursday, September 15, 2011
Imagemagick - pdf, etc
A trail of crumbs about turning JPGs into printable PDFs. The key is "printable", because we can move jpgs into a pdf without any issues, but what does it take to print? Also in this post: converting PDF to JPG's (ImageMagick)
For example, suppose we have a simple two-page letter: we sign it and it's ready to mail so we scan it. We want to take the two jpgs, one for each page, and make it into a single 2-page pdf. This is trivial. Put them in a directory and
For example, suppose we have a simple two-page letter: we sign it and it's ready to mail so we scan it. We want to take the two jpgs, one for each page, and make it into a single 2-page pdf. This is trivial. Put them in a directory and
$ convert *.jpg somefilename.pdfIf this gives low quality or a too-large file, try the more recent version, which is compression specific, eg JPEG or PNG:
$ convert *.jpg -compress JPEG somefilename.pdfWe want this as close to copy quality, in case we have to print it later. Particularly so if we have a collection of handwritten notes from a class. Clarity is important.
scanning resolution
I typically don't scan at more than 75 lines, because that makes a clean copy for a jpg and it isn't unreasonably large.merge pdf's into one
$ gs -q -sPAPERSIZE=letter -dNOPAUSE -dBATCH -sDEVICE=pdfwrite -sOutputFile=out.pdf a.pdf b.pdfUsing GhostScript, quality is maintained, unlike if "convert" from ImageMagick is used. ImageMagick is good for going from one file type, say jpg's, and converting to another, say pdf's. If you run it with pdf's as the input and output, quality is diminished. Other pdf merge programs are not typically installed with a distro, but can be added...eg, pdftk and pdfconcat.
PDF to JPG
I have a multiple page PDF and I want to break it out into individual. Sometimes I can get away with 75 lines, but it works much cleaner at 150:$ convert -density 150 some.pdf %d.jpgAnd out they come.
Thursday, September 8, 2011
cups - hp office jet pro 8500a
Links: open printing.org scroll down for tarball link uninstall hplip hp-setup options
 Hey, I like printer installations the easy way, typically in about 10 minutes or less with lpadmin and CUPS from the command line. The 8500A, however, is an HP printer. HP documentation states that HP translation software (HPLIP), in addition to CUPS, is required for all HP printers operating with Linux. Nevertheless, many HP printers work without HPLIP, once the .ppd file can be installed. I attempted to install this HP8500A without HPLIP, and it worked. The description for the process is in Part 1 below. Parts 2 and 3 document the installation of the printer using HPLIP. Some steps in Parts 2 and 3 are repeats from Part 1.
Update 3/2013: The tarball appears to no longer be easily available. Substituted is the annoying "hplip-3.13.3.run (21.7 MB)", which most pages link to. I eventually located a tarball via this page, after scrolling down a bit.
2. During install, lpadmin searches for .ppd's in directory /usr/share/cups/model. Root up, copy the HP5800A .ppd to that directory (and chmod 644 the file) so it will be able to find it. Alternatively, in Ubuntu, these may be placed into /usr/share/ppd/cupsfilters.
3. In order to use lpadmin, activate CUPS...
4. The above is all that is typically required. However, this printer was not detected by CUPS following installation. The HP printer apparently broadcasts in such a way that it does not allow detection without root. That is to say, if one runs $ lsusb , the HP is not found. The printer is found with # lsusb. This is a group permissions issue, so I ran $ groups and, sure enough, I was not a member of the lp group at the user level. Solution, uninstalled the printer...
5. Attempting to print, however, the printer hung -- "processing" the file without printing it. I recalled I also had an installed USB Brother that had been working. A look at the list of the installed printers to see if there were differences revealed:
and added the line
First, proceed the first part of Part 3 below to make sure HPLIP is properly installed. This may be an extensive project requiring software updates and other bullsh*t.
Following HPLIP installation, you need to be certain the HP printer is detectable at the user level. Why? The program hp-install is necessary for installation and it must be run at the user level, not the root level. If hp-install cannot detect the printer, it cannot install it. But the HP printer broadcasts in such a way that it does not allow detection without group membership or root. That is to say, if one runs $ lsusb , the HP is not found, but it IS found with # lsusb. To correct the permission, run
 On the CUPS side, cupsd also apparently allowed HPLIP to write into the configuration file /etc/cups/printers.conf. The working configuration file (including the Brother):
 Hey, I like printer installations the easy way, typically in about 10 minutes or less with lpadmin and CUPS from the command line. The 8500A, however, is an HP printer. HP documentation states that HP translation software (HPLIP), in addition to CUPS, is required for all HP printers operating with Linux. Nevertheless, many HP printers work without HPLIP, once the .ppd file can be installed. I attempted to install this HP8500A without HPLIP, and it worked. The description for the process is in Part 1 below. Parts 2 and 3 document the installation of the printer using HPLIP. Some steps in Parts 2 and 3 are repeats from Part 1.
Pt 1 What worked (w/out HP software)
short version
- Download the .ppd, even if it's inside a larger HPLIP release. Discard the remaining HPLIP software
- Put the .ppd into /usr/share/cups/model so lpadmin can locate it
- Add FileDevice Yes to /etc/cups/cupsd.conf if it's not already there and restart CUPS to read the change
- Add the user to group lp (or lpadmin -- check /etc/cups/cupsd.conf to verify the group), and be sure the system can see the printer in basic user mode, eg, the printer should be visible in $ lsusb
- Using ///dev/usb/lp0 seems to work better than usb:/dev/usb/lp0 in the installation line
long version
1. Download the latest HPLIP source tarball. Why? CUPS needs a .ppd (printer information) file for any printer it operates, HP or otherwise. However, the installation wizard is unnecessary. Only the source tarball is necessary. From the tarball, extract the relevant .ppd and discard the remaining 20MB. That is, after extracting the HP8500A ppd (hp-officejet_pro_8500_a910.ppd), discard the remaining HPLIP software.Update 3/2013: The tarball appears to no longer be easily available. Substituted is the annoying "hplip-3.13.3.run (21.7 MB)", which most pages link to. I eventually located a tarball via this page, after scrolling down a bit.
2. During install, lpadmin searches for .ppd's in directory /usr/share/cups/model. Root up, copy the HP5800A .ppd to that directory (and chmod 644 the file) so it will be able to find it. Alternatively, in Ubuntu, these may be placed into /usr/share/ppd/cupsfilters.
3. In order to use lpadmin, activate CUPS...
# service start cups...then fire-up udevmonitor, plug the printer in to the USB, note its /dev ID, and add the USB printer to that /dev address
# lpadmin -p hp8500 -E -v usb:/dev/usb/lp0 -m hp-officejet_pro_8500_a910.ppdOr, if the printer is on a network, find its net address and then...
# lpadmin -p hp8500 -E -v socket://192.168.1.101/printer -m hp-officejet_pro_8500_a910.ppd
4. The above is all that is typically required. However, this printer was not detected by CUPS following installation. The HP printer apparently broadcasts in such a way that it does not allow detection without root. That is to say, if one runs $ lsusb , the HP is not found. The printer is found with # lsusb. This is a group permissions issue, so I ran $ groups and, sure enough, I was not a member of the lp group at the user level. Solution, uninstalled the printer...
# lpadmin -x HP8500A...and added myself as a user to the lp group using the GUI invoked from
# userconfigThere's some file that can be sourced after that to update the system, but I just rebooted so save effort. I installed again and the printer was detected.
5. Attempting to print, however, the printer hung -- "processing" the file without printing it. I recalled I also had an installed USB Brother that had been working. A look at the list of the installed printers to see if there were differences revealed:
# lpstat -vNote the Brother device shows a slightly different /dev URL than the HP. I uninstalled the HP again (lpadmin -x), and reinstalled using ///dev/usb/lp0. This led to an error
device for Brother: ///dev/usb/lp0
device for hp8500: usb://dev/usb/lp0
# lpadmin -p hp8500 -E -v ///dev/usb/lp0 -m hp8500a.ppdAccordingly, opened the file /etc/cups/cupsd.conf
lpadmin: File device URIs have been disabled! To enable, see the FileDevice directive in "/etc/cups/cupsd.conf".
and added the line
FileDevice YesRestarted CUPS so the conf file would be read. Uninstalled the printer and installed it again
# lpadmin -p hp8500 -E -v ///dev/usb/lp0 -m hp8500a.ppdPrints without problems.
Pt 2 What worked (HPLIP and other HP software)
First, proceed the first part of Part 3 below to make sure HPLIP is properly installed. This may be an extensive project requiring software updates and other bullsh*t.
Following HPLIP installation, you need to be certain the HP printer is detectable at the user level. Why? The program hp-install is necessary for installation and it must be run at the user level, not the root level. If hp-install cannot detect the printer, it cannot install it. But the HP printer broadcasts in such a way that it does not allow detection without group membership or root. That is to say, if one runs $ lsusb , the HP is not found, but it IS found with # lsusb. To correct the permission, run
# userconfigto invoke the groups and users GUI. Add the user to the lp group and reboot. Check that the printer is detected at the user level:$ lsub If all is OK, note the USB address, which in this case was 002:003. Now you can install the printer:
$ hp-install -i --auto 002:003Ater the installation, there is a short authentication step requiring root, but this is the final step. It should print.
Pt 3 What DIDN'T work (HPLIP and other HP software)
HPLIP v.3.11.7 goes inta...
Who knows? Some directories somewhere in my system. Did a standard configure, which dumped-out and told me I couldn't do a network build without SNMP installed. Annoying and unnecessarily prohibitive, since all an Ethernet printer needs is a TCP/IP stack, which was already there, and I wasn't going to rearrange my SNMP installation just for HPLIP requirements. But what could I do -- the HPLIP programmers had hard-coded the SNMP requirement? Ok then, decision made: forget networking. So, disabled network capability, then completed a standard make and # make-install. Again, no telling into which directories.will HPLIP work?
Come on, you know it didn't. The first error looked like thisFilter "hpcups" for printer "HP8500A" not available: No such file or directoryA guy, ccin1492, on Linux Questions found that his similar problem was related to where HPLIP was putting its files:
It appears that HPLIP is putting stuff in one directory /usr/lib64/cups/filter, but CUPS is putting stuff in /usr/lib/cups/filter. So to fix my problem I linked the following files into /usr/lib/cups/filter so CUPS can see them.And so on. In my installation, it appeared that the HPLIP was putting stuff in to /usr/lib/cups/filter, but that's not where CUPS was looking. CUPS was looking for shiat where it usually does, in /usr/share/cups/model. So I made soft links to that directory but I still had no luck. Next thing, I ran hp-check. Here are the errors it located (leaving out the successes)
hpcups*
hplipjs*
pstoraster*
pstopxl*
$ hp-check -tHow wonderful to have HPLIP working for me, right?
Checking for dependency: CUPS DDK - CUPS driver development kit...
warning: NOT FOUND! This is an OPTIONAL/RUNTIME ONLY dependency. Some HPLIP functionality may not function properly.
Checking for dependency: libnetsnmp-devel - SNMP networking library development files...
error: NOT FOUND! This is a REQUIRED dependency. Please make sure that this dependency is installed before installing or running HPLIP.
Checking for dependency: PIL - Python Imaging Library (required for commandline scanning with hp-scan)...
warning: NOT FOUND! This is an OPTIONAL/RUNTIME ONLY dependency. Some HPLIP functionality may not function properly.
Checking for dependency: PolicyKit - Administrative policy framework...
warning: NOT FOUND! This is an OPTIONAL/RUNTIME ONLY dependency. Some HPLIP functionality may not function properly.
Checking for dependency: PyQt 4 DBus - DBus Support for PyQt4...
error: NOT FOUND! This is a REQUIRED/RUNTIME ONLY dependency. Please make sure that this dependency is installed before installing or running HPLIP.
Checking for dependency: Reportlab - PDF library for Python...
warning: NOT FOUND! This is an OPTIONAL/RUNTIME ONLY dependency. Some HPLIP functionality may not function properly.
removing HPLIP
Let's get this garbage out and try something else. To remove HPLIP, I first had to figure out where it was. Looking around (another half hour), the two main places appeared to be /usr/local/bin and /usr/local/share/hplip. Accordingly, I destroyed them.# rm -r /usr/local/bin/hp*I left hpcups, in case I needed that for the ppd I intended to retrieve from open printing.org. I knew some of the HP ppd's at OpenPrinting were standalone instead of HPLIP dependent. Digging into the OpenPrinting HP8500A documentation though, I was still eventually routed back to HPLIP. But I didn't give up. I figured that, if I could just edit an HP ppd enough to make it work with cupsd instead of requiring hpcups, I'd be set. And I would have been set, but no, inside the HP8500A ppd, it makes proprietary HP printer calls which CUPS does not independently recognize. Dang it, back to needing HPLIP or just getting a Brother printer (they all work like a charm with CUPS).
# rm -r /usr/local/share/hplip
# rm -r /usr/local/share/cups/drv/*
hplip again
By this point, I had wasted more than 12 man hours configuring the "free" HP8500A I had access to, when I could have instead bought a network compatible Brother HL-2270DW for $100. Really smart. Anyway, the first step to returning HPLIP was deleting my manual installation of the ppd# lpadmin -x HP8500ANext, recompiling. This time, I didn't bother with fax, scanner, copier, or network capability, hopefully to make it a simple HPLIP install for basic USB printing.
$ configure --disable-network-build --disable-hpijs-only-build --disable-qt4 --enable-qt3 --disable-fax-buildAfter installation, received errors
$ hp-setupLook for hpmudext.
Traceback (most recent call last):
File "/usr/local/bin/hp-setup", line 45, in
from base import device, utils, tui, models, module
File "/usr/local/share/hplip/base/device.py", line 39, in
import status
File "/usr/local/share/hplip/base/status.py", line 45, in
import hpmudext
ImportError: No module named hpmudext
$ find -name hpmudext*It's in there, so for some reason HPLIP can't find the directory or doesn't recognize the version. Check python version.
./usr/local/lib/python2.6/site-packages/hpmudext.so
./usr/local/lib/python2.6/site-packages/hpmudext.la
$ python -VNoting here, that Python 2.6.1 goes with HPLIP version 3.5.10-4 , but I have HPLIP version 3.11.7 compiled and installed. It might be advisable to remove the newer version of HPLIP I have installed and replace it by compiling and installing the older 3.5.10-4 version of HPLIP, but the printer (HP8500A) is a new model and there is no ppd support in the older 3.5 HPLIP. I'll need that newer HPLIP to interface with the printer. What to do? I could save the newer ppd and attempt to use it with the older HPLIP, I suppose. First lets make a soft link to where HPLIP is finding other modules and see if it can locate hpmudext.so there.
Python 2.6.1
# ln -s /usr/local/lib/python2.6/site-packages/hpmudext.so /usr/lib/python2.6/hpmudext.soBetter, but still errors.
# ln -s /usr/local/lib/python2.6/site-packages/hpmudext.la /usr/lib/python2.6/hpmudext.la
$ hp-setupLook for cupsext.
warning: CUPSEXT could not be loaded. Please check HPLIP installation.
$ find -name cupsext*Appears same problem there as with hpmudext, so lets make softlinks for cupsext too.
./usr/local/lib/python2.6/site-packages/cupsext.so
./usr/local/lib/python2.6/site-packages/cupsext.la
# ln -s /usr/local/lib/python2.6/site-packages/cupsext.so /usr/lib/python2.6/cupsext.soAlso made similar links to scanext and pcardext, to complete the four Python extension links. Now let's try to run hp-setup again.
# ln -s /usr/local/lib/python2.6/site-packages/cupsext.la /usr/lib/python2.6/cupsext.la
$ hp-setupAppears we have functionality using the softlink hack, but no GUI. We can live without a GUI: not into engineering a PyQt install. So let's attempt "interactive mode" for another half page printout of information.
HP Linux Imaging and Printing System (ver. 3.11.7)
Printer/Fax Setup Utility ver. 9.0
Copyright (c) 2001-9 Hewlett-Packard Development Company, LP
This software comes with ABSOLUTELY NO WARRANTY.
This is free software, and you are welcome to distribute it
under certain conditions. See COPYING file for more details.
error: PyQt not installed. GUI not available. Exiting.
warning: Qt/PyQt 3 initialization failed.
error: hp-setup requires GUI support (try running with --qt4). Also, try using interactive (-i) mode.
$ hp-setup -iHave to read up on hp-setup command options apparently. Here's a good page for hp-setup commands that I'll also put above in the links. Meanwhile, let's go purchase a USB cable - getting close.
HP Linux Imaging and Printing System (ver. 3.11.7)
Printer/Fax Setup Utility ver. 9.0
Copyright (c) 2001-9 Hewlett-Packard Development Company, LP
This software comes with ABSOLUTELY NO WARRANTY.
This is free software, and you are welcome to distribute it
under certain conditions. See COPYING file for more details.
(Note: Defaults for each question are maked with a '*'. Pressto accept the default.)
Using connection type: usb
error: No device selected/specified or that supports this functionality.
permissions
Along with its other problems, HPLIP brings a permission complication. The HP printer broadcasts in such a way that it does not allow detection without root. That is to say, if one runs $ lsusb , the HP is not found. The printer is found with # lsusb. But this means hp-install, which is run at the user level, cannot locate the printer and install it until this permission is addressed. I ran $ groups and noted I was not a member of the lp group.# userconfigAdded the user to the lp group -- there's some file you can source after that to update it, but it's easier just to reboot. Following the reboot, the user level $ lsub found the printer at 002:003. At that point, I simply ran
$ hp-install -i --auto 002:003This successfully added the printer, the only pause being to authenticate as root during the final step. I have a Brother also installed (CUPS only) and this is how the print options appeared when I selected "Print" in a document menu.
 On the CUPS side, cupsd also apparently allowed HPLIP to write into the configuration file /etc/cups/printers.conf. The working configuration file (including the Brother):
# cat /etc/cups/printers.conf
Printer configuration file for CUPS v1.3.9
# Written by cupsd on 2011-09-10 15:16
<Printer Brother>
Info Brother
DeviceURI file:///dev/usb/lp0
State Idle
StateTime 1303970446
Accepting Yes
Shared Yes
JobSheets none none
QuotaPeriod 0
PageLimit 0
KLimit 0
OpPolicy default
ErrorPolicy stop-printer
</Printer>
<Printer Officejet_Pro_8500_A910>
Info Automatically setup by HPLIP
Location
DeviceURI hp:/usb/Officejet_Pro_8500_A910?serial=3VN0DGP2XN
State Idle
StateTime 1315693016
Accepting Yes
Shared Yes
JobSheets none none
QuotaPeriod 0
PageLimit 0
KLimit 0
OpPolicy default
ErrorPolicy stop-printer
</Printer>
Thursday, August 25, 2011
pidgin hijinx
Links: pidgin iptux
Note: iptux and giver are two other LAN messengers briefly considered here. Giver has a Novell mono dependency, which is to say "Microsoft mono dependency", and it was abandoned in 2009, around the time MSoft acquired Novell. Go figure. I didn't bother with that one. Iptux looks pretty good. Current development. No WAN connection. Behaves itself by not attempting to jump outside the LAN. No server. Presence detection. Fast.
I installed Pidgin several years ago for simple local messaging on the home LAN using a basic Bonjour protocol. It's worked great for simple text messages. This week I wanted to move files around the LAN in some easy way without mounting via NFS. Just need the occasional ad-hoc file transfer between systems. I attempted to use Pidgin and found that my installation, which was v2.5, would open a file, but then stalled without transferring any of the file.I checked for MTU limitations, ran those down to 1400, but still could not do it. Attempts were made on two Linksys routers, a cheapo e1000 and an older befsr41 dug-out from the storage shed. Neither router could transfer. I only want this for a LAN, not going out over the Net, so it was annoying. I hate NFS mounts because they're persistent, must be configured, require mounting points, and a lot of other garbage. Fuse is similarly out. So, back to the drawing board with Pidgin and Bonjour.
Note: iptux and giver are two other LAN messengers briefly considered here. Giver has a Novell mono dependency, which is to say "Microsoft mono dependency", and it was abandoned in 2009, around the time MSoft acquired Novell. Go figure. I didn't bother with that one. Iptux looks pretty good. Current development. No WAN connection. Behaves itself by not attempting to jump outside the LAN. No server. Presence detection. Fast.
I installed Pidgin several years ago for simple local messaging on the home LAN using
ethernet/nic checks
Initial checks with ethtool and mii-tool showed all was fine and I was easily able to rapidly copy files between the two computers using scp as long as the sshd daemon was turned-on on both computers. Still, no file transfer with Pidgin.version checks
The most recent, as I write, is version 2.10. Of greater interest to me is which dependencies will provide which sort of support, since I want to be sure and build-in file transferring. Libpurple is included in the build. For installation, I just made sure the old version 2.5 was removed and then did configure, make , make install. All went well and I had file transfer.Monday, May 30, 2011
wusb54g - ralink 2500
A family member running kernel 2.6.28.7 was having some problems with her older Linksys WUSB54G (Ralink 2500 chip). As seen in the photo, this is an external USB Wi-Fi card.  When I installed her system (Zenwalk Slackware) back in 2009, ndiswrapper was the answer for this chip, which was posing problems for some Linux installations. It did fine, even with encryption and so on. Recently however, the relatives de-encrypted their network, probably so a visiting relative could use their network or during a Windows update, and the Linksys card was unable to associate with the LAN router once the network was keyless. This is a matter of opening or dropping the encryption configuration line and then ordering the remaining lines. However, over a telephone, implementing these kinds of changes required a lot of patience from my relative (thank you, Mom!). Ultimately, at least over the phone, it appeared there was no associating to this unencrypted network via ndiswrapper and using standard commands such as, say:
Then I got to thinking about the old rt2500 driver. This driver is anachronistic, as all of these legacy Ralink cards now are managed directly in the kernel. But it is less anachronistic than ndiswrapper. Further, it would be a lot to ask a family member to update their entire system, a full Linux installation, with only telephone guidance. It looked like the middle ground would be to withdraw ndiswrapper and install the last/latest rt2500 driver to see if it was less finicky. Would the source for this older driver still be available. Turns out it was no longer available at the Ralink site. Summary: I couldn't travel to Mom's place to make the changes and it had been going slowly over the phone.
Ralink This is supposed to take care of the patch stuff according to this site
Before compiling, be sure the card ID "1737:0078" is included in the card ID section. I located them by navigating to the top source directory and then
Still within the source directory, I also made the following change
After all of this, the rt2870sta was a no-go. A deeper look, showed that it lacks product and bus information and was not even being assigned an IRQ or other resources. For example, compare it to the (working) Atheros card below
 When I installed her system (Zenwalk Slackware) back in 2009, ndiswrapper was the answer for this chip, which was posing problems for some Linux installations. It did fine, even with encryption and so on. Recently however, the relatives de-encrypted their network, probably so a visiting relative could use their network or during a Windows update, and the Linksys card was unable to associate with the LAN router once the network was keyless. This is a matter of opening or dropping the encryption configuration line and then ordering the remaining lines. However, over a telephone, implementing these kinds of changes required a lot of patience from my relative (thank you, Mom!). Ultimately, at least over the phone, it appeared there was no associating to this unencrypted network via ndiswrapper and using standard commands such as, say:
iwconfig wlan0 essid FooSo it was a conundrum. We tried several different permutations, as noted above, before giving-up for the weekend.
iwconfig wlan0 key open #(or using "off")
iwconfig wlan0 ap 00:20:etc
Then I got to thinking about the old rt2500 driver. This driver is anachronistic, as all of these legacy Ralink cards now are managed directly in the kernel. But it is less anachronistic than ndiswrapper. Further, it would be a lot to ask a family member to update their entire system, a full Linux installation, with only telephone guidance. It looked like the middle ground would be to withdraw ndiswrapper and install the last/latest rt2500 driver to see if it was less finicky. Would the source for this older driver still be available. Turns out it was no longer available at the Ralink site. Summary: I couldn't travel to Mom's place to make the changes and it had been going slowly over the phone.
Solution: Linksys WUSB100
I locally purchased a WUSB100, id 1737:0078 ($15), to install onto my system, make configuration software, and then mail to her. There are two versions of WUSB100Version 1 module rt2870sta
This site indicates that the the rt2870sta works with the following Linksys USBs:USB: 1737:0070 Linksys WUSB100 v1 RangePlus Wireless Network Adapter [Ralink RT2870]Noting that my 1737:0078 is not on that list
USB: 1737:0071 Linksys WUSB600N v1 Dual-Band Wireless-N Network Adapter [Ralink RT2870]
USB: 1737:0077 Linksys WUSB54GC v3 802.11g Adapter [Ralink RT2070L]
Version 2 - module rt2870 or rt3070?
Written on the back of the WUSB100 in my possession: FCCID Q87-WUSB100v2. Still began with the rt2870 since some were having success with this. The kernel would recognize it and assign ra0, but would not assign memory resources or allow connection. During this process, found there are at least two chips in version 2, the Belkin 050d:825b or what I have, the Ralink chip 1737:0078. I'm on the right track but, for the Ralink chip, it appears will have to go to the rt3070sta which means a patch is necessary. That will be my next weekend project. Meanwhile, I've also left the Belkin stuff here for those who have Belkins.Ralink This is supposed to take care of the patch stuff according to this site
I believe the fix is to replace all instances of usb_buffer_alloc with usb_alloc_coherent and all instances of usb_buffer_free with usb_free_coherent. The instances I replaced were in include/os/rt_linux.h and os/linux/rt_usb_util.c.Belkin
preinstalled driver attempts
Well before I compiled the rt3070sta module, I had hoped for the good luck of a driver included with the distro working. In favor of such a dream, the WUSB100 was detected by udevmonitor and lsusb. However, no module was being loaded. Thus, I looked in the wifi driver directory for useful drviers included with the distro:$ls /lib/modules/2.6.28.7/kernel/drivers/net/wireless/I tried loading some of these with modprobe but the card continued to go unreachable. That is, in spite of modprobing these drivers in, the command
[snip] rtl8187.ko rt2x00 (directory) rtl8180.ko
$ls /lib/modules/2.6.28.7/kernel/drivers/net/wireless/rt2x00
rt2400pci.ko rt2500pci.ko rt2500usb.ko rt2x00lib.ko rt2x00pci.ko rt2x00usb.ko rt61pci.ko rt73usb.ko
#ifconfig ra0 up (or wifi0, etc)was yielding nothing. Back to the Google machine.
module rt2870sta attempts
Also before compiling the rt3070sta, I'd noticed some had success with the rt2870sta module and a few tweaks. It wasn't already onboard:root[/]# find -iname rt2870*
root[/]#
- downloaded rt3070sta, now deprecated, cached here (scroll down to "nightflier"'s post) and also here, along with some associated patches.
- downloaded the rt2870sta source, now deprecated, here.This provided me with version2010_0709_RT2870_Linux_STA_v2.4.0.1.tar.bz2.
- downloaded the firmware, same location. File is RT2870_Firmware_V22.zip.
- The settings for rt2870sta.dat are explained here
rt2870sta compiling notes
most comprehensive linkBefore compiling, be sure the card ID "1737:0078" is included in the card ID section. I located them by navigating to the top source directory and then
$ grep -r USB_DEVICE *In my source, these statements were in /common/rtusb_dev_id.c. I added the line in there:
{USB_DEVICE(0x1737,0x0078)}, /* Linksys WUSB100v2 Pepsi */(I like Pepsi, so whatever). In this fellow's source, they were in rt2870.h.
Still within the source directory, I also made the following change
$ geany /os/linux/config.mkBlacklist any modules that might attempt to load and conflict.
HAS_WPA_SUPPLICANT=y
HAS_NATIVE_WPA_SUPPLICANT_SUPPORT=y
# geany /etc/modprobe.d/blacklistBacked-up the default /etc/Wireless/RT2870STA/RT2870STA.dat
blacklist rt2x00usb
blacklist rt2x00lib
blacklist rt2500usb
# cp /etc/Wireless/RT2870STA/RT2870STA.dat /etc/Wireless/RT2870STA/RT2870STA.bak.defCompiling is a basic $make/#make install operation. Unzip and install the firmware, although I noted no significant change from before the firmware was installed to after.
# cp Download/RT2870_Firmware_V22/rt2870.bin /lib/firmware/After compiling, installation, and modprobing, it's good to run # depmod, so I did that as well. Zince I'm using Zlackware Zenwalk, added the MAC to /etc/iftab. Added the module and updated the kernel
# chmod 555 /lib/firmware/rt2870.bin
# depmod
After all of this, the rt2870sta was a no-go. A deeper look, showed that it lacks product and bus information and was not even being assigned an IRQ or other resources. For example, compare it to the (working) Atheros card below
# lshw -C network
*-network
description: Wireless interface
product: AR242x 802.11abg Wireless PCI Express Adapter
vendor: Atheros Communications Inc.
physical id: 0
bus info: pci@0000:05:00.0
logical name: wifi0
version: 01
serial: 00:2e:xx:xx:xx:xx
width: 64 bits
clock: 33MHz
capabilities: pm msi pciexpress msix bus_master cap_list logical ethernet physical wireless
configuration: broadcast=yes driver=ath_pci ip=192.168.1.2 latency=0 multicast=yes wireless=IEEE 802.11g
resources: irq:18 memory:f3100000-f310ffff
*-network
description: Wireless interface
physical id: 1
logical name: ra0
serial: 68:3e:xx:xx:xx:xx
capabilities: ethernet physical wireless
configuration: broadcast=yes driver=RALINK WLAN driverversion=2.4.0.0 multicast=yes wireless=Ralink STA
Saturday, May 21, 2011
ffmpeg - phone size
Links: volume post general howto random settings
Mp4's and flv's are our friends, cell-phone sized (320x240 generic, 432x320 iPhone) viewables. Trick with ffmpeg is getting them there without pixellation and the right volume settings. This entry is just a collection of transcoding settings I've played with. There are plenty of good howto's out there forum information.
Mp4's and flv's are our friends, cell-phone sized (320x240 generic, 432x320 iPhone) viewables. Trick with ffmpeg is getting them there without pixellation and the right volume settings. This entry is just a collection of transcoding settings I've played with. There are plenty of good howto's out there forum information.
audio :: volume and sync
Sometimes .flv files are the correct size but with sync or volume inconsistencies. Resampling to keep volume the same is done by leaving off volume settings, or using the default setting of -vol 256. Going to 512 will double it, and I've found that 768 works well if the original sound is faint. So, to resample with an increase in volume:$ ffmpeg -i somefile.flv -vol 512 -acodec libfaac someout.flvI find specifying "libfaac" avoids libmp3 and its playback oddities. Increases the output file size by maybe 10 percent, say from 5.8M to 5.9M, but stable playback.
video :: pixellation
I think the pixellation that occurs shrinking videos is if the pixel size stays the same size as it was for the larger version. Also, 2 pass encoding is probably the best, sending the first pass to null, and turning off the audio ("an") and video (-y /dev/null)$ ffmpeg somefile.avi -pass 1 -f rawvideo -y /dev/null -an
Sunday, May 15, 2011
moto V3 - linux
Links: p2kmoto source moto4lin source
My old HTC G1 was recently ripped-off at work and I didn't want to purchase a G2X, so it had me thinking. First I thought I'd pay the $120 insurance deductible and get a replacement G1 to take me to whenever I made a decision. Second though, I had an old V3 (device code ID 22b8:4901) sitting in a drawer -- why not activate it and see if I could live with WAP and a non-QWERTY keypad until I decided? Meanwhile, see if 2011 Linux access was enough to save contacts and photos.

Compile and install p2kmoto, which puts in libp2kmoto, and the CLI executable p2ktest. Then, hook-up the phone (it takes a micro-USB cable) and run # p2ktest to see if it's connecting in the right ways. I first ran # udevmonitor to be sure that HAL was doing the right things with the phone; also double-checked with # lsusb. All was good.
Next compile and install moto4linux. The moto4linux is run simply as user, but it won't find the phone. So the order is:
My old HTC G1 was recently ripped-off at work and I didn't want to purchase a G2X, so it had me thinking. First I thought I'd pay the $120 insurance deductible and get a replacement G1 to take me to whenever I made a decision. Second though, I had an old V3 (device code ID 22b8:4901) sitting in a drawer -- why not activate it and see if I could live with WAP and a non-QWERTY keypad until I decided? Meanwhile, see if 2011 Linux access was enough to save contacts and photos.

activation - 10 minutes plus driving time
My G1 was T-Mobile, and I had served the two year plan. The V3 was a Cingular phone and I had also served the Cingular contract prior to switching to T-Mobile G1 in 2008. Before I switched to T-Mobile, I went to the Cingular store (by then, AT&T) and they gave me the unlock code for the V3. I never used the code, so I brought it with me to the T-Mobile store last week with the old V3. At the T-Mobile store, a dude put in a new SIM and entered the code. The V3 fired right up. He switched the V3 onto the plan I had for the G1, and away I went. I sat in the parking lot and messed with the text and the WAP for awhile, and it seemed to work. It was a blast from the past.PC connection - a few hours
The part of the experiment Googling around for Linux access to Motorolas was uninspiring. It appeared the likely candidates were p2kmoto and moto4linux. These two pieces work together. Available at the links at the top of the page.Compile and install p2kmoto, which puts in libp2kmoto, and the CLI executable p2ktest. Then, hook-up the phone (it takes a micro-USB cable) and run # p2ktest to see if it's connecting in the right ways. I first ran # udevmonitor to be sure that HAL was doing the right things with the phone; also double-checked with # lsusb. All was good.
Next compile and install moto4linux. The moto4linux is run simply as user, but it won't find the phone. So the order is:
# p2ktestThe above two commands are all that are needed to manage phone access and files. P2ktest apparently finds and opens the phone for access; moto4linux then does the file management. It (moto4linux) opens a GUI, so it's cut and pasty.
$ moto4linux
WAP access - ongoing
Wednesday, April 27, 2011
cups - brother mfc-8840d
Links: Openprinting.org (Printing) Sane project (Scanning) Brother (manufacturer)
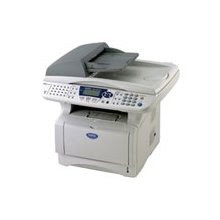
1. Accordingly, began at Openprinting.org and retrieved the ppd file. Renamed the file "brothermfc8840d.ppd" for ease of use and copied it into /usr/share/cups/model. CUPS locates printer information files in that directory.
2. In order to use lpadmin, turned-on CUPS:
3. Walked to printer to retreive info but, ah-hah!, it turned out there was no WiFi in the Brother MFC-8840D. The networking capacity my friend apparently hoped was WiFi is only Ethernet. The printer has 3 ports: USB, Ethernet, and parallel. I went ahead and completed the install using USB so my buddy could determine whether his previous printing problems were in XP or the printer itself.
4. Turned the printer on and connected the USB cable to my laptop, running # udevmonitor to get the port name "/usb/lp0". I then opened /etc/cups/printers.conf and changed the URI to a USB connection:
5. Restarted CUPS so that CUPS re-read the printers.conf file with the updated USB information:
Looked through the SANE database and noted Linux compatibility with the MFC-8840D is listed as "good". That said, a person can go with a simple or a very involved scanner installation. Below, I include both but break it into two parts. For simple scanning using the Xsane GUI, the simple installation will do. For OCR, specialized file handling, and so forth (all of this is possible), a complete install may be necessary. Before I start on these, some checks and the procedures which apply to both a simple of full install are provided.
Checks The scanner portion of the Brother can be difficult for the system to detect. These checks provide confirmation of detection and useful information during any stage of the installation. Use freely:
Preference: I run programs as "user", not "root", so I changed the permissions for this device by simply moving it into my user-level 'lp' (printer) group. First found the device in my rules:
B3. Check it:
B6. Must then create a script for each desired function. This site has samples of all of them. There are limitless tweaks for file size, OCR use, etc etc etc. Can go crazy with this -- the scripts are entirely configurable for nearly any function.
pt1: printing
A friend has an older Brother printer, the MFC-8840D (device code 04f9:0160), an all-in-one copy-print-fax machine. He mentioned that the machine is reachable via its USB port or via a built-in WiFi card, but neither were apparently operating consistently with his XP box. It piqued my interest because I hadn't previously configured a WiFi printer w/Linux. The MFC8840D seemed like a good place to start -- Openprinting.org noted it has "excellent" performance with Linux.
1. Accordingly, began at Openprinting.org and retrieved the ppd file. Renamed the file "brothermfc8840d.ppd" for ease of use and copied it into /usr/share/cups/model. CUPS locates printer information files in that directory.
2. In order to use lpadmin, turned-on CUPS:
# service start cupsAdded the printer:
# lpadmin -p Brother -E -v socket://192.168.1.101/printer -m brothermfc8840.ppdPrinter installed and the /etc/cups/printers.conf file was properly generated. Only remaining task was to retrieve the HOSTNAME and TCP/IP info from the printer and update /etc/cups/printers.conf in a text editor with this info.
3. Walked to printer to retreive info but, ah-hah!, it turned out there was no WiFi in the Brother MFC-8840D. The networking capacity my friend apparently hoped was WiFi is only Ethernet. The printer has 3 ports: USB, Ethernet, and parallel. I went ahead and completed the install using USB so my buddy could determine whether his previous printing problems were in XP or the printer itself.
4. Turned the printer on and connected the USB cable to my laptop, running # udevmonitor to get the port name "/usb/lp0". I then opened /etc/cups/printers.conf and changed the URI to a USB connection:
# cat /etc/cups/printers.conf
# Printer configuration file for CUPS v1.3.9
# Written by cupsd on 2011-04-27 23:00
<Printer Brother>
Info Brother
DeviceURI file:///dev/usb/lp0
State Idle
StateTime 1303970446
Accepting Yes
Shared Yes
JobSheets none none
QuotaPeriod 0
PageLimit 0
KLimit 0
OpPolicy default
ErrorPolicy stop-printer
</Printer>
5. Restarted CUPS so that CUPS re-read the printers.conf file with the updated USB information:
# service restart cupsPrints without any apparent problems. Installation time: 10 minutes. Did not initialize or verify the printer's scanner operation.
pt2: scanning
Links: Howto w/scripts Howto w/scripts Gentoo HowtoLooked through the SANE database and noted Linux compatibility with the MFC-8840D is listed as "good". That said, a person can go with a simple or a very involved scanner installation. Below, I include both but break it into two parts. For simple scanning using the Xsane GUI, the simple installation will do. For OCR, specialized file handling, and so forth (all of this is possible), a complete install may be necessary. Before I start on these, some checks and the procedures which apply to both a simple of full install are provided.
Checks The scanner portion of the Brother can be difficult for the system to detect. These checks provide confirmation of detection and useful information during any stage of the installation. Use freely:
$ scanimage --testNecessary
$ scanimage - L
$ brscan-skey -l
$ sane-find-scanner
- Verify "brother" is in the list in the /etc/sane.d/dll file. If it is not, add it.
- The sane configuration directory must have a "brother.conf". Check with ls /etc/sane.d/. If there is no brother.conf, make one. Get the printer device number using $ sane-find-scanner and then make the file:
# nano /etc/sane.d/brother.conf
usb 0x4f9 0x16e
option connect-device
Preference: I run programs as "user", not "root", so I changed the permissions for this device by simply moving it into my user-level 'lp' (printer) group. First found the device in my rules:
# cat /etc/udev/rules.d/30-scanners.rules |grep "Brother MFC-8840"Second, went to line 915 and changed permissions and groups. Before the changes:
# Brother MFC-8840D
After changes:
ATTRS{idVendor}=="04f9", ATTRS{idProduct}=="0160", MODE="0664", GROUP="scanner", ENV{libsane_matched}="yes"
ATTRS{idVendor}=="04f9", ATTRS{idProduct}=="0160", MODE="0666", GROUP="lp", ENV{libsane_matched}="yes"With these in place, moved on to the software.
A. Simple Installation ~ 10 minutes
A1. Proprietary Brother scanning software. This is supposedly freely available at the Brother site. The Brother site maintains only .rpm/.deb files. I run Slackware, so I used rpm2tgz to convert and then installpkg:A2.Check scanner operation:
$ cd downloads
$ rpm2tgz brscan*
$ mkdir brscan
$ cp brscan-0.2.4-0.i386.tgz /brscan
$ cd brscan
$ su
# installpkg brscan-0.2.4-0.i386.tgz
# exit
$ brsaneconfig (it works)
$ scanimage --testA3. Open XSane in the menu and scan sh*t.
B. Full Installation ~ 8 hrs
B1. Install the 32 bit brscan.B2. Install the 32 bit brscan-skey.
$ cd downloads
$ rpm2tgz brscan*
$ mkdir brscan
$ cp brscan-0.2.4-0.i386.tgz /brscan
$ cd brscan
$ su
# installpkg brscan-0.2.4-0.i386.tgz
# exit
$ brsaneconfig (it works)
$ cd downloads
$ rpm2tgz brscan-skey*
$ mkdir brscan
$ cp brscan-skey-0.2.1-3.i386.tgz /brscan
$ cd brscan
$ su
# installpkg brscan-skey-0.2.1-3.i386.tgz
# exit
$ brscan-skey (it works)
B3. Check it:
$ brscan-skey -lB4. At this point, the scanner scanned just fine, but the jpg was not saved and I was getting the error message:
MFC-8840D : brother:bus6;dev1 : USB Not registered
$ sane-find-scanner
found USB scanner (vendor=0x04f9, product=0x0160) at libusb:002:003
$ scanimage -L
device `brother:bus5;dev1' is a Brother MFC-8840D USB scanner
ERROR: No such file or directory [/usr/local/Brother/sane/brscan-skey-0.2.1-3.cfg]B5. Must therefor create the file /usr/local/Brother/sane/brscan-skey-0.2.1-3.cfg
# nano /usr/local/Brother/sane/brscan-skey-0.2.1-3.cfg
password=
IMAGE="sh /usr/local/Brother/sane/script/scantoimage-0.2.1-3.sh"
OCR="sh /usr/local/Brother/sane/script/scantoocr-0.2.1-3.sh"
EMAIL="sh /usr/local/Brother/sane/script/scantoemail-0.2.1-3.sh"
FILE="sh /usr/local/Brother/sane/script/scantofile-0.2.1-3.sh"
SEMID=b
B6. Must then create a script for each desired function. This site has samples of all of them. There are limitless tweaks for file size, OCR use, etc etc etc. Can go crazy with this -- the scripts are entirely configurable for nearly any function.
pt3: faxing
No phone available here, but this appears relatively straightforward and the software is likewise available at the Brother site.Saturday, March 26, 2011
spring 2011 - celly status
I ultimately grabbed a T-Mobile G1 around the time I wrote a cell status blog entry in 2008. I've been very happy with the phone and service. Currently, the plan's been paid since October of last year. T-Mobile unlocked the G1 and I've been considering a newer phone recently. I like T-Mobile service.
But since 2008, I'm amazed at how significantly the landscape for considering a phone and service plan has changed. Stated simply, the Android G1 was a huge financial success and I hope Google can weather all of the lawsuits that appear to come with success in America these days.
In my view, the success of Android/G1 was that it combined good HTC hardware with an excellent software scenario (for a 2008 phone). Android had some lockdowns, but compared to the garbage software in Windows phones, it was a different universe. The G1's only real competitor was the iPhone and, in that contest, the G1 also arguably carried an advantage. The Apple iPhone has proprietary lockdowns on its software and charged for most applications. Conversely, the G1/Android allowed open-source Android application development. This meant random developers created thousands of apps, many of them free. One could download these directly through the Google Market. Android continues to grow in relevance and anyone, eg you, can create an Android application.
Below are my upgrade considerations of provider and hardware/software, but I'll also skip to the chase here and note that the T-Mobile G2 is my decision. Here is a reasonable video review of the phone. (11:44)

I consider T-Mobile a customer-friendly and fair-priced cell service. Also T-Mobile is one of the two major US providers (T-Mobile, ATT) who's cell technology is moving from WCMDA to HSPA+. Phones with the WCDMA (legacy GSM) protocol can also be used in Europe. When traveling to Europe, just purchase a plan and a SIM upon arrival - no need to purchase another phone. That said, in the longer run, it appears both the US and Europe will eventually migrate to LTE, and this will likely be a standard across all of the big 4 carriers (Sprint, Verizon, ATT, T-Mobile).
provider legal
ATT :: ATT is the licensed US provider of the iPhone. They must have noted that many potential iPhone/ATT customers turned instead to the reasonable pricing and customer service package of G1/T-Mobile. In response, ATT has apparently been unable or unwilling to compete. Instead, ATT appears poised to buy T-Mobile. Following the purchase, ATT can simply raise the lower rates of T-Mobile customers to ATT rates, and needn't improve ATT customer-service or service plans. Very discouraging, and I hope this purchase does not pass FCC/DoJ muster. ATT would have both iPhone and Android phone accounts, as well as any WCDMA phone, and all without competition in pricing.
Looking at Android phones, currently, the interesting processors are the Qualcomm Snapdragon and the Hummingbird, both of which are ARM Cortex A8 cores. The Hummingbird is faster, but HTC chose to produce the G2 with the 800 MHz Snapdragon. However, even though Hummingbird would have been preferable, the G2 runs Android OS 2.2 Froyo, which is optimized. In benchmarks, the G2 running the Snapdragon with Froyo appears to be faster than other phones running the Hummingbird. This may be in part to the G2's GPU. Whatever the reason for its performance, I'm pleased with the G2's second generation.
The G2 ships with about 1.2GB available internal memory, and an 8GB SD card (can take up to a 32GB sd card). Since it's running 2.2, applications can be saved to the SD card. There's a 5 megapixel camera, and it takes 720P video.
hardware/software legal
Oracle :: Following Google/Android's success, Oracle decided to buy Sun-Java in 2010. Initially, this seemed odd, since it only seemed to provide Oracle with some relatively unprofitable IP rights to Java, Open-Office, and MySQL. It turns out that the Android OS arguably uses a portion of Java not perfectly protected by Google's previous release agreement with Sun-Java. Oracle was thereby immediately able to sue Google for remedies ($$$) under US software patent laws. Little need to wonder why Oracle purchased Sun-Java.
Microsoft :: Current US software patent law also apparently allows preemptive coercive strikes. Microsoft attorneys recently found a way to make the G1's hardware manufacturer, HTC, pay licensing fees to Microsoft. This was so that HTC, which uses no Microsoft software, could continue to build Google's phones without risking legal harrassment from Microsoft. Microsoft seems to argue these days that the entirety of open-source software is ultimately based on Microsoft's code. This has never been proven anywhere, but who can afford to take on Microsoft legal gunslingers? Cheaper to just pay the license.
Apple :: Apple simply decided the best strategy was to sue HTC. Apple appears to claim G1 technology really belongs to Apple. Give me a break.
Taken together then, HTC is being sued (by Apple) for what it does produce, and being legally pressured for what it doesn't produce (by Microsoft). Meanwhile, Oracle is suing Google, and ATT is attempting to buy out T-Mobile. God help organizations that attempt to innovate and produce a successful product in today's America. I will buy the G2 just to help HTC and Google's legal defense funds, if for no other reason. The G1 was a great phone and the litigation is about greed, not about commonly held views of justice.
But since 2008, I'm amazed at how significantly the landscape for considering a phone and service plan has changed. Stated simply, the Android G1 was a huge financial success and I hope Google can weather all of the lawsuits that appear to come with success in America these days.
In my view, the success of Android/G1 was that it combined good HTC hardware with an excellent software scenario (for a 2008 phone). Android had some lockdowns, but compared to the garbage software in Windows phones, it was a different universe. The G1's only real competitor was the iPhone and, in that contest, the G1 also arguably carried an advantage. The Apple iPhone has proprietary lockdowns on its software and charged for most applications. Conversely, the G1/Android allowed open-source Android application development. This meant random developers created thousands of apps, many of them free. One could download these directly through the Google Market. Android continues to grow in relevance and anyone, eg you, can create an Android application.
Below are my upgrade considerations of provider and hardware/software, but I'll also skip to the chase here and note that the T-Mobile G2 is my decision. Here is a reasonable video review of the phone. (11:44)

provider
I consider T-Mobile a customer-friendly and fair-priced cell service. Also T-Mobile is one of the two major US providers (T-Mobile, ATT) who's cell technology is moving from WCMDA to HSPA+. Phones with the WCDMA (legacy GSM) protocol can also be used in Europe. When traveling to Europe, just purchase a plan and a SIM upon arrival - no need to purchase another phone. That said, in the longer run, it appears both the US and Europe will eventually migrate to LTE, and this will likely be a standard across all of the big 4 carriers (Sprint, Verizon, ATT, T-Mobile).
provider legal
ATT :: ATT is the licensed US provider of the iPhone. They must have noted that many potential iPhone/ATT customers turned instead to the reasonable pricing and customer service package of G1/T-Mobile. In response, ATT has apparently been unable or unwilling to compete. Instead, ATT appears poised to buy T-Mobile. Following the purchase, ATT can simply raise the lower rates of T-Mobile customers to ATT rates, and needn't improve ATT customer-service or service plans. Very discouraging, and I hope this purchase does not pass FCC/DoJ muster. ATT would have both iPhone and Android phone accounts, as well as any WCDMA phone, and all without competition in pricing.
hardware/software
Looking at Android phones, currently, the interesting processors are the Qualcomm Snapdragon and the Hummingbird, both of which are ARM Cortex A8 cores. The Hummingbird is faster, but HTC chose to produce the G2 with the 800 MHz Snapdragon. However, even though Hummingbird would have been preferable, the G2 runs Android OS 2.2 Froyo, which is optimized. In benchmarks, the G2 running the Snapdragon with Froyo appears to be faster than other phones running the Hummingbird. This may be in part to the G2's GPU. Whatever the reason for its performance, I'm pleased with the G2's second generation.
The G2 ships with about 1.2GB available internal memory, and an 8GB SD card (can take up to a 32GB sd card). Since it's running 2.2, applications can be saved to the SD card. There's a 5 megapixel camera, and it takes 720P video.
hardware/software legal
Oracle :: Following Google/Android's success, Oracle decided to buy Sun-Java in 2010. Initially, this seemed odd, since it only seemed to provide Oracle with some relatively unprofitable IP rights to Java, Open-Office, and MySQL. It turns out that the Android OS arguably uses a portion of Java not perfectly protected by Google's previous release agreement with Sun-Java. Oracle was thereby immediately able to sue Google for remedies ($$$) under US software patent laws. Little need to wonder why Oracle purchased Sun-Java.
Microsoft :: Current US software patent law also apparently allows preemptive coercive strikes. Microsoft attorneys recently found a way to make the G1's hardware manufacturer, HTC, pay licensing fees to Microsoft. This was so that HTC, which uses no Microsoft software, could continue to build Google's phones without risking legal harrassment from Microsoft. Microsoft seems to argue these days that the entirety of open-source software is ultimately based on Microsoft's code. This has never been proven anywhere, but who can afford to take on Microsoft legal gunslingers? Cheaper to just pay the license.
Apple :: Apple simply decided the best strategy was to sue HTC. Apple appears to claim G1 technology really belongs to Apple. Give me a break.
summary
Taken together then, HTC is being sued (by Apple) for what it does produce, and being legally pressured for what it doesn't produce (by Microsoft). Meanwhile, Oracle is suing Google, and ATT is attempting to buy out T-Mobile. God help organizations that attempt to innovate and produce a successful product in today's America. I will buy the G2 just to help HTC and Google's legal defense funds, if for no other reason. The G1 was a great phone and the litigation is about greed, not about commonly held views of justice.
Subscribe to:
Comments (Atom)
